
29 Aug Step-by-Step Process of a Loft Conversion: What to Expect
In recent years, one of the most common home remodeling projects has been loft conversions. They offer more space without the trouble of moving, in addition to significantly increasing the value of your home. A loft conversion can totally change your house, whether you’re looking for a new bedroom, home office, or comfortable sitting space.
It’s normal to feel a little overwhelmed if this is your first time organizing one. The steps involved in a loft conversion will be explained in detail in this guide, along with what to anticipate at each turn.
Step 1: Initial Consultation and Survey
A professional consultation is the first step in the journey. A specialist will now evaluate the potential of your loft. To decide whether your loft is suitable for conversion, factors like head height, roof pitch, and the overall structure are assessed.
A thorough inspection will also point out any possible obstructions, like structural beams, chimneys, or water tanks. This first step guarantees that your vision is feasible and within your financial means.
Step 2: Design and Planning
The design stage starts after viability is established. Whether you want a large master suite, a creative studio, or a useful guest room, you will collaborate with an architect or designer to develop comprehensive plans that represent your objectives.
Depending on your roof structure and tastes, this step may also entail talking about options like mansard designs, hip-to-gable conversions, or dormer extensions.
Your architect will guide you through the application process if planning permission is needed (in situations where the design substantially changes the roof shape). Nonetheless, a lot of loft conversions are covered by permitted development rights, which speeds up approval considerably.
Step 3: Obtaining Permissions and Building Regulations Approval
Building regulations approval is required even though planning permission isn’t always required. This guarantees the safety, structural integrity, and energy efficiency of your loft conversion.
The following are important topics covered by building regulations:
- Structural stability (floor reinforcements, support beams)
- Fire safety (fire-resistant doors, escape routes)
- Insulation (soundproofing and thermal)
- Design and accessibility of staircases
To verify compliance, a building inspector will examine your project at various points.
Step 4: Preparing the Site
Your contractor will get the site ready before construction starts. This could entail organizing material deliveries, erecting scaffolding, and cleaning out the loft area. Another crucial aspect of this stage is shielding your current house from dust and disturbance.
Step 5: Structural Work
Strengthening the existing floor to support the additional load is the first significant construction step. Depending on your design, steel beams or timber joists may be added. For the remainder of the build to have a solid foundation, this step is essential.
In order to optimize usable space and natural light, any roof extensions or dormer windows that are part of the plan will also be built during this phase.

Step 6: Installing Windows and Insulation
The loft area is then made brighter by installing dormer or roof windows. After that, appropriate insulation is put in place to control temperature and boost energy efficiency. At this stage, the loft will begin to take shape as a cozy, habitable space.
Step 7: Electrical, Plumbing, and Heating
During this phase, any heating, plumbing, or electrical systems that are needed for your loft conversion are installed. Examples include installing radiators, wiring outlets and lights, and even installing an ensuite bathroom.
Professionals with the necessary qualifications make sure that all installations adhere to safety standards and offer the convenience you require in your new area.
Step 8: Plastering and Finishing Touches
Plastering is used to create a smooth finish on the walls and ceilings after the structural and mechanical work is finished. Painting, laying flooring, and adding fixtures and fittings like doors, skirting boards, and lighting come next.
For homeowners, this is the most exciting phase since the room begins to take on the appearance of a more useful one.

Step 9: Final Inspection and Approval
To make sure all rules have been followed, a building inspector will perform a final inspection. A completion certificate, which is necessary for property records and resale purposes, will be issued to you upon approval.
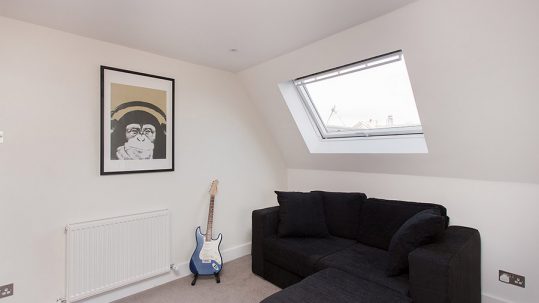
Step 10: Interior Design and Enjoying Your New Space
At last, it’s time to decorate and furnish your loft. Your new loft will add usefulness and charm to your house, whether you use it as a chic home office, a chic guest bedroom, or a comfortable family lounge.
Conclusion
A loft conversion is a satisfying project that raises your home’s value and comfort level. You will know exactly what to anticipate at every stage of the process if you comprehend it step-by-step, from design and consultation to construction and completion. Your unutilized attic can be turned into a gorgeous, useful area that improves your lifestyle with careful planning and expert assistance.
For expert loft conversion services that blend creativity with precision, Prince Design London offers bespoke solutions tailored to your home. Their experienced team ensures seamless design, construction, and finishing for every project.
No Comments